"To Key Or Not To Key? That Is The Question!"
By David (Doc) Wescombe-Down, VK5BUG.

Had trouble trying to master a Morse key? I think we all have. Perhaps a Cootie (or sideswiper) key is the answer. It takes the unnatural up and down movement of a straight key and turns it on its side for a more natural action that is more comfortable and not so stressful or tiring. Interested? Please read on.
Many CW operators, amateur and professional, have struggled to become truly comfortable with the traditional "up and downer" straight key. A specific type of fatigue known as "glass arm" has often been experienced by operators who worked up to 8-hour shifts in coast radio, PMG, ship and military settings since telegraphy first arrived on the communication scene. "Glass arm" was later to be known by the more popular term of Carpal Tunnel Syndrome, and may be caused by various unnatural, repetitive movement patterns.
The speed key or semi-automatic "bug" was developed early last century to remedy this, but the humble Cootie key preceded it by about 16 years. Though completely different in construction, operation and on-air sound, both have been based on forming the code characters using a sideways action with the rocking armature or paddle instead of the traditional vertical action. Royal Australian Navy (RAN) operators (of which I happily was one!) knew Cootie keys as "Sidewankers" and their use in the RAN was widespread right up until the demise of Morse in the 1980s.
A Cootie key does not require a power source (other than "forearm and wrist grease"!) or costly circuitry. It has a natural movement "feel" about it and can be built for almost nothing except one's time and junkbox materials.
Historically, the first commercial model was made by JH Bunnell & Co in the USA, patented in 1888 and sold until the 1920s. It had two fixed contacts (left & right) and was driven using a horizontal motion of one hand and forearm combination that flopped a paddle arm between the two contacts like a flat-blade switch. The driving wrist used a side-to-side rocking movement with thumb and first two fingers held in a relaxed "reverse letter-C" attitude. This rocking movement was repeated left and right to form the dit and dah elements of the code. The original Bunnell keys were not portable and were screwed to the operating desk in the same way that ships had their traditional keys mounted.
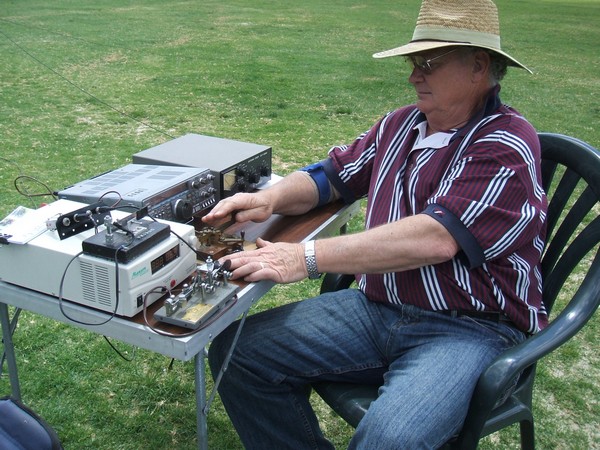
 The semi-automatic "bug" key was patented in 1892 and sold by Horace Martin from around 1904 to allow operators to use less effort in sending code for longer periods. Martin's Original and Junior keys were the forerunners of the Vibroplex dynasty that survives in production today. Photo 1 shows my Vibroplex Champion bug in daily use by the author. Correct adjustment of a "bug" key is essential, as endorsed by the US Army Technical Manual (in Emm, 2006):
The bug is designed to make sending easy rather than fast, and perfect control of the key is far more important than speed. Be especially careful to send dits accurately. Not all radio operators have equally sensitive hearing, and careless sending on the semiautomatic key will not be understood.
Since Morse has taken a back seat in modern amateur radio times, there is plenty of on-air chit chat confusion as to what constitutes a "bug key". Categorically, it is non-electronic and produces automatic dits only: the operator still needs to form the dahs and thereby construct each letter, symbol and prosign by hand.
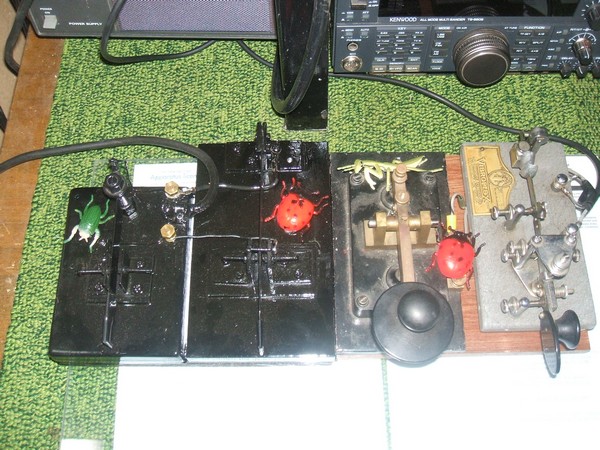
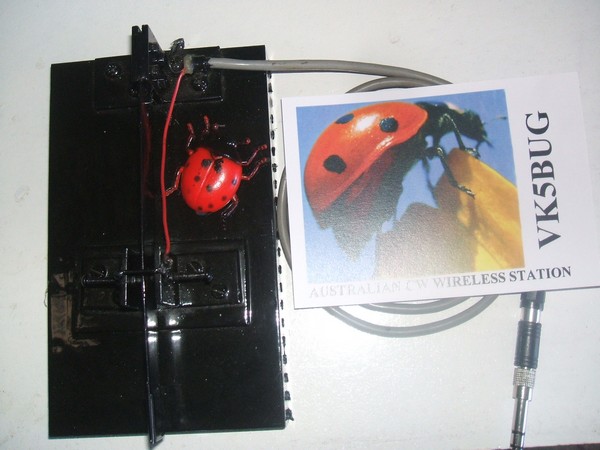
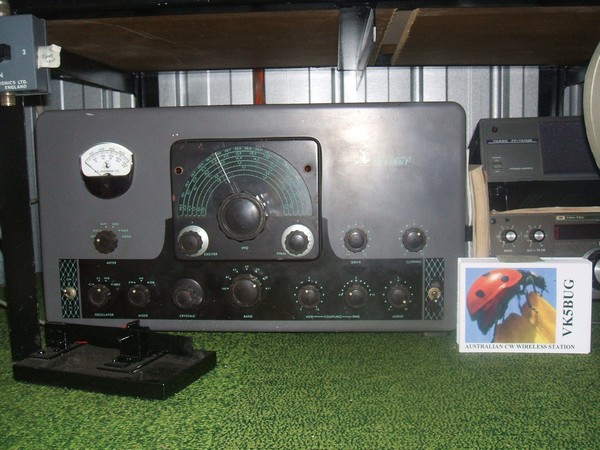
 Since a Cootie key operates so simply, it can be readily made by almost anyone having a few basic hand tools and matching skills. Some units have been made from metal contacts mounted on marble, plastic, timber, glass or any other type of insulating material. The swiper arm can be made from double-sided printed circuit board, copper or brass strip, an old hacksaw blade (Photo 2, built by the author), stainless steel breadknife blade (Photo 3, built by the author), razor blade, glider clip or sheet metal scraps. Alternatively, a Kent, Vibroplex or Bencher single paddle key can be operated as a Cootie key by jumpering the dit and dah contact posts to the "hot" side of a transmission key jack, while also using the common earth connection as part of the keying circuit as normal.
 I made the breadknife blade key to suit my personal touch and style, and this particular model is a delight to use and has the best keying action of any key type I have tried in over four decades of searching for "the ultimate key".
I have been fortunate enough to have used both Cootie keys and "bugs" for 45 years at sea and ashore (my current VK5BUG callsign must be a coincidence!!) and only separate their convenience and fun of operation by the speed of use required. Quality code from a Cootie key seems best when driven at speeds less than about 22 words per minute, after which some buzzing or blurring of dits can occur, particularly if the contact-to-swiper arm spacing is inadequate. The "bug" key can crank out 50, 60 and more words per minute: remember though, you have to find someone who can read what it is you are sending at the higher speeds!!
Therein lies the critical set-up difference between the two types of side-action keys: a Cootie key needs a wide gap, firm tension and longer swiper arm travel, where a "bug" key relies on a narrow gap, lighter tension and shorter swinging armature travel.
If any of this whets your appetite, there are lots of excellent websites to explore, many complete with sound and video that show off the diversity of Cootie key variants and how to use one.
Here are a few to get you started:
- DJ5IL's homebrew sideswiper.
- NT9K's sideswipers.
- "QLF? NOT WITH THE GREAT LAKES SIDESWIPER! ALMOST PERFECT CW", by David H. Atkins, W6VX.
- "Adjusting Straight Keys, Paddles, & Bugs", by N1FN.
- "The Art & Skill of Radio-Telegraphy", Ch. 10, by William G. Pierpont, N0HFF.
- "The Banana Boat Swing and Other Distinctive 'Fists' - CW Notes With Character", by George F. Franklin, W0AV.
Details for building a double-contact Cootie key were provided in QST magazine for July 1960, pp 28-29 and 148. If you want to make your own Cootie key and actually use it, try practicing every number, letter, punctuation etc off air until you feel confident about your sending. Here is a suggested process for getting started:
Place your thumb and first two fingers of your preferred hand lightly against the swiper arm in a reverse letter-C position. Gently oscillate that hand from side to side, alternating the brief tapping against the swiper arm, allowing the fingers to cease contact with it as the thumb has its turn in pushing, and then vice versa for the fingers. Make a string of dahs, trying for uniformity of length and spacing between. Next try a string of dits, not too fast and again, of uniform composition. Play with dits and dahs to develop a feel for the alternating action. Once you feel "at home" with the action, you can start to work on assembling dit and dah elements into the desired code characters. These need to be made with a rhythmic pattern of course, and that is why it makes sense to spend some preliminary time in just getting used to the swiping from side to side. It is not an action of tapping against one of the contacts but of alternating between both. Try for just 10 minutes practice each day and you will soon create entire code symbols, words, phrases and sentences.
Form the dahs to the left, right, left, right, left, right, left, right, left, right, left, etc in a string, and then make a series of dits in the same manner left, right, left, right, left, right, left, right, left, right etc.
Once that feels comfortable, mix them up in batches eg dits L-R-L-R-L immediately followed by dahs R-L-R-L-R. Repeat this type of cycling action to gain control of the "swish" from side to side that creates a code element at each contact.
The next step is to send a string of alternating dits and dahs beginning with the fingers making the dits (didahdidahdidah for a right handed operator) and then the fingers making the dahs (dahdidahdidahdit for a right handed operator).
As you begin to control these actions, experiment with some of the longer, flowing action numbers eg L(dit) R(dah) L(dah) R(dah) L(dah) for 1, R(dit) L(dit) R(dah) L(dah) R(dah) for 2 and so on. Next, try some of the "swishy" letters such as Q, Y, P, X, C and L.
When you feel a sense of rhythmic mastery over these characters, turn your efforts to each alphabet letter, culminating in practicing each letter and number many, many times during your 10-minute daily sessions. Learning to send quality Morse is very similar to learning a language or music: a short quality session every day produces better brain and motor skill retention than a half hour session once a week.
The general pattern for sending, once these preliminary exercises are mastered, is to start the next symbol with the thumb or fingers left "vacant" at the end of the previous symbol. In other words, pick up from where you left off -- don't feel that you always have to begin a symbol with the left side contact, for example.
Perhaps now would be an appropriate time to fish through the excellent and extensive wireless telegraphy website at RadioTelegraphy.net where there are hundreds of Morse key types, feature collections, commercially available keys, hints on learning the code, key maintenance advice, sourcing parts for key restoration, Q and Z operating signals and their meanings, QRP information and high speed code contest information.
If the itch to build your own key arises from that exercise, then another website at The Telegraph Office might provide the design, examples, motivation, hints, links and advice for this next project in your Wireless Office!

I hope this has been of some interest and use to readers and I look forward to a Cootie key QSO with you on the lower bands one day!
References.
1. Emm, M. (2006). Adjusting straight keys, paddles and bugs. Sourced on-line from Milestone Technologies, Inc.
2. Suggested by Corrine Jackson, this timeline of the telegraph and Morse Code is a great educational guide. You can learn how the telegraph and continuous wave changed the history of communication! You can also gain a better understanding of how Morse Code was used throughout history, and learn how to decipher the Morse Code alphabet!
73
David (Doc) Wescombe-Down, VK5BUG.
November 2009.

