F8FJG's keys.
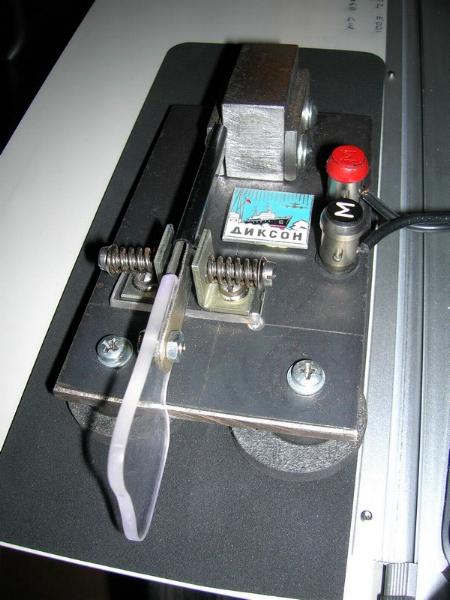
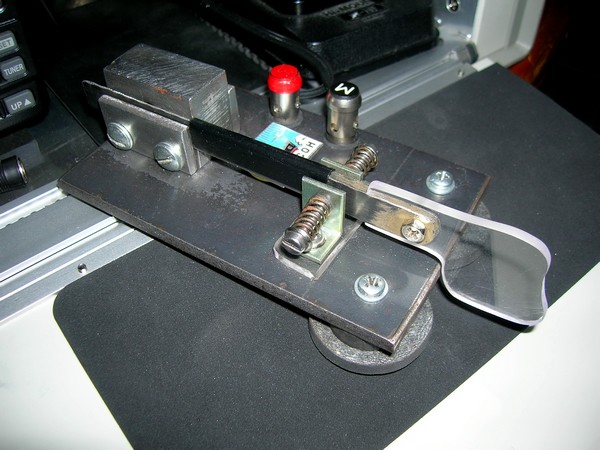
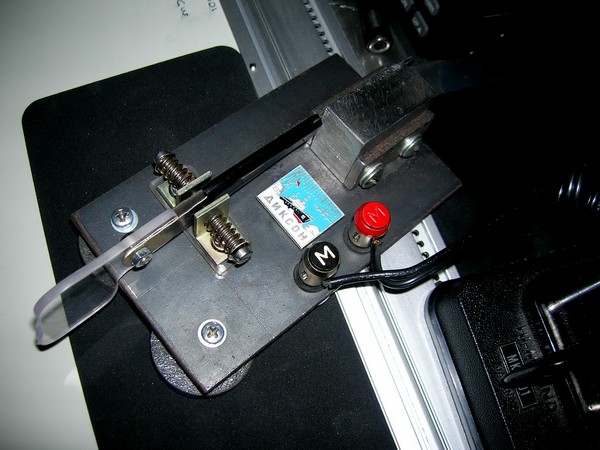
Homebrew Dikson sideswiper.
This hacksaw blade key is not really difficult to build, but one needs a set of a few easy-to-use tools and some imagination to design it. The key is made using available tools and parts.
The first question that arises is: How am I going to use the available materials to produce a well-working instrument that doesn't look too crude? Quite a program...I've got a smattering of general mechanics, mainly metal working, but just a fading knowledge in that matter. In this type of program, there's always something missing. It's often difficult to find two matching parts, or the required screws and nuts. In short, it took me one day to build the key and to adjust it.
I first found a steel base (in my workshop "junk box") on which I've mounted all the parts. The spring lever consists of two hacksaw blades clipped together instead of a single blade, to increase the amount of stiffness and to get a fine action during the lateral thumb/index finger motion. The terminals must have good electrical insulation, as they are mounted on the steel base; defective insulation could cause some malfunctions. The contacts have been improved by silver soldering on each contact point to obtain neat signals and to avoid scratchy sending. I've mounted four adhesive cushioned feet under the base of the key so that it stays put during operation. An ergonomic finger piece made out of Plexiglas is shaped to adapt to my fingering. Good sanding of the steel base and grinding of the hacksaw blade teeth complete the finishing work. To embellish this sideswiper, I've stuck on the logo of a Russian polar expedition to Dikson Island. It's a nice way to travel from my armchair when using the key.
The next step was the test phase. Initially, the key appeared to be steady, responsive, and had a smooth action. The two contact spacings must be carefully adjusted to suit the operator's preference. My first "on the air" tests were conclusive, though with some sending errors; a few details had yet to be worked out. During the first tests, it took some time to get used to this homemade key. For a given type of key, when the operator sends with a new instrument, a certain adaptation period is always required. A small rubber damper was needed to prevent the blades from vibrating when the finger piece was somewhat quickly released. This little damper device really solved this problem.
 In conclusion, knocking up a hacksaw blade key (also called a "cootie key" or "sideswiper") is an exciting project within the reach of any average handyman. The result is really satisfactory, and it's great fun for an operator to send with their own homemade key.
Lots of professional operators have built this type of key in order to improve the ease of sending, even when the use of such equipment was sometimes banned. The use of the straight key was not always that easy, for instance at sea when seas were rough. With a hacksaw blade type of key, the wrist and forearm are resting on the operating desk, causing less fatigue when long messages have to be sent. Another advantage of this type of key is that its action is twice as fast as that of a straight key in the formation of the characters. Lots of old timers used to say by experience that when manipulating this "War Beast" (as my friend Henri F8AAM calls it), the essential points are the regularity of the rhythm and the clarity of sending, not the speed. This key leaves room for creativity. Each operator develops their own personality and sending style, and can make the characters sing in their own rhythm. In a way, this is the sideswiper's song and dance.
[F8FJG].


